
TL;DR

Get kitchen staples and gadgets delivered free — and shop member deals
- Fast, free delivery on millions of items
- Access to Prime Big Deal Days deals on October 6–7
- Prime Video, Amazon Music and more included
Halloween-themed cake decorating kits bundle seasonal toppers, sprinkles, stencils, candles, or piping supplies so you can make a festive cake with fewer separate purchases. Check the piece count, cake size, skill level, allergen details, and which decorations are edible before you buy; then add delicate decorations close to serving time.
A cake can look Halloween-ready in five minutes—or swallow your whole Saturday. The difference often comes down to whether your decorations work together and suit the cake you have actually baked.
Halloween-themed cake decorating kits bundle seasonal pieces such as toppers, sprinkles, stencils, candles, and sometimes piping supplies. They can help home bakers create seasonal cakes with less planning, but kit contents vary widely. A bright pumpkin set may be perfect for a school party, while a gothic topper kit may feel out of place at a little kid’s birthday.
This guide shows you how to choose a kit by cake size, skill level, style, and food safety. You’ll also get a practical decorating plan, tips for handling allergies and non-edible pieces, and a way to stretch one kit across cupcakes or cookies without making the dessert table look mismatched.
Read the exact kit contents and quantities; Halloween decorating kits do not have a standard set of tools or decorations.
Choose ready-made toppers, sprinkles, or stencils if you want a beginner-friendly design with little piping.
Match topper size and decoration count to your cake, cupcakes, guest count, and overall dessert plan.
Check ingredient and cross-contact statements, identify non-edible pieces, and remove picks, wires, and candles before serving.
Add delicate candy, chocolate, or paper decorations close to serving, and store perishable cake safely.
What a Halloween cake decorating kit can—and can’t—do for you
A Halloween-themed cake decorating kit is a collection of coordinated tools or decorations for giving a cake a seasonal look. It may include ghosts, bats, pumpkins, sprinkles, candles, stencils, piping bags, or edible shapes, but sellers do not follow one standard recipe for what goes in the box.
That lack of a standard matters when you’re planning dessert. One kit might give you a dozen plastic toppers and no frosting tools; another might supply piping tips and colored sugar but no centerpiece. Those kits solve different problems: toppers make it easy to establish a theme, while tools give you more control but require frosting, time, and some practice. According to the product facts summarized here, check the item description and quantities before buying instead of assuming “kit” means everything you need.
Think of the kit as a small costume box for your cake, not a finished cake in a carton. It can save you from sourcing several coordinated decorations, but it will not necessarily include the cake, frosting, or tools needed to use them. If you already have a frosted chocolate cake, a few orange and purple sprinkles plus a haunted-house topper may be plenty. If you’re starting with plain cupcakes for 20 guests, you’ll need enough decorations for each cupcake—or a plan to use shared accents on a tray.
For example, imagine you buy a kit that includes six large toppers for a party with 24 cupcakes. It can still work: put one topper in the center of a cupcake wreath and scatter sprinkles across the rest. But if each guest expects an individual themed cupcake, six toppers won’t stretch very far. Match quantities to servings, and consider whether you value a dramatic shared centerpiece or a decorated treat for every guest. Check whether you need to buy cake, frosting, food coloring, or basic tools separately, since those extras can change the kit’s overall value.
As an affiliate, we earn on qualifying purchases.
Choose a kit that suits your guests and decorating confidence
Choose a Halloween kit by matching its design style and decorating demands to the people at your party. Ready-made toppers and sprinkles are usually easier for beginners than intricate piping, while a spooky or gothic design may suit adult guests better than a family gathering with young children. The tradeoff is that ready-made decorations are quick and predictable, but offer less room to personalize; hands-on techniques can create a distinctive look, but need practice and time.
| Kit style | Best for | What to check |
|---|---|---|
| Cute pumpkins and ghosts | Children’s parties, school events, family gatherings | Small-piece warnings and age guidance |
| Classic bats and cobwebs | A flexible look for mixed-age guests | Whether the web effect needs a stencil or steady piping |
| Gothic black and metallic accents | Adult parties and dramatic dessert tables | Edible status, color transfer, and topper materials |
| Tools and piping-focused sets | Bakers who enjoy hands-on decorating | Which tips, bags, and frosting are included |
A kit’s skill level is not just about how artistic you are. It also depends on how much time you have and what your frosting can do. A smooth buttercream top can take a stencil neatly; a soft, freshly frosted cake may smear when you lift one. A stencil is therefore a good shortcut only when the cake surface is firm enough and you have time to test the technique; otherwise, simple toppers are more reliable.
Say you have 30 minutes before guests arrive and a toddler eager to help. Choose sturdy, ready-made decorations and let the child scatter sprinkles over a tray. Save delicate piping or tiny picks for another day. A simple design done neatly often looks more inviting than an ambitious one that leaves you wrestling with melting candy while the doorbell rings. Consider who will handle the decorating, too: a child-friendly kit may still contain small pieces that need adult supervision.
How to decorate with a kit without turning prep into a project
To decorate with a Halloween kit, first confirm what each piece is, prepare the cake, arrange the design dry, and add decorations in an order that protects the frosting. This five-step plan helps you avoid last-minute surprises, especially when your kit includes both edible pieces and plastic toppers. Planning before anything touches the frosting matters because misplaced decorations can leave marks, and some pieces cannot be repositioned once pressed into a soft cake.
- Read the package. Count the pieces, check serving or age guidance, and identify edible decorations, non-edible parts, and any allergens. This tells you what needs adult handling and whether the kit can safely serve everyone at the table.
- Match the surface. Check the cake’s diameter and frosting. A kit intended for cupcakes may look sparse on a large layer cake, while bulky toppers may crowd a small cake or tip into soft frosting.
- Sketch the layout. Place toppers on the cake without pressing them in, or arrange the pieces beside it. Keep the tallest decoration near the center so it does not crowd the edges. A dry run also helps you decide which pieces to leave out, rather than forcing every item into a design.
- Decorate from broad to fine. Add frosting or a color wash first, then sprinkles or stencil details, and finish with fragile pieces. This order keeps small details from being covered or smeared by later steps.
- Inspect before serving. Remove packaging, count non-edible picks and wires, and tell guests if any decorative parts need to come off. A final check is especially useful when decorations blend into dark frosting or are used on individual slices.
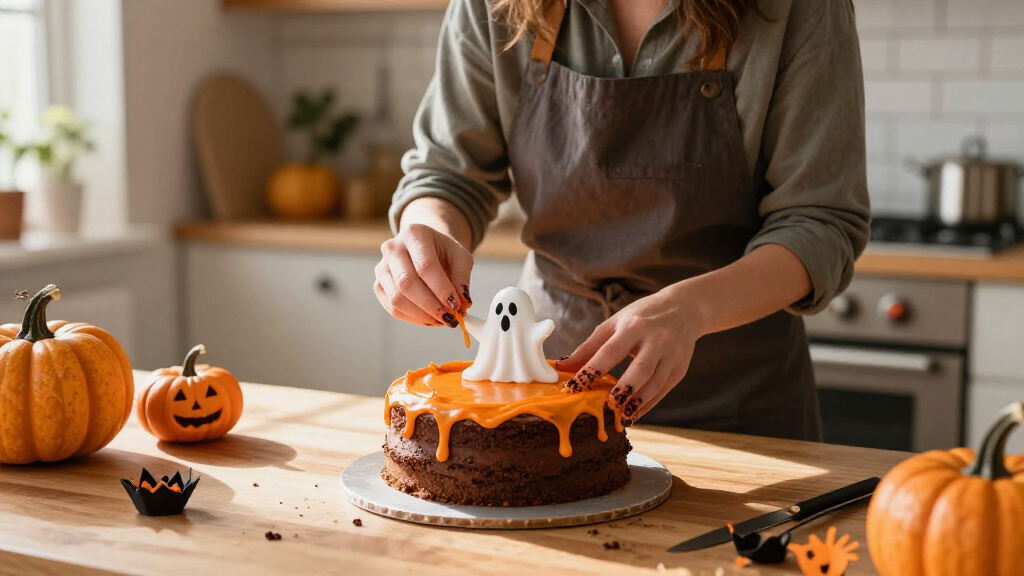
Here’s a real-world version: for a 9-inch cake, you might spread orange frosting, stencil a black bat near the rim, add a few purple sprinkles, and finish with one ghost topper. The cake looks planned, but you have not piped a single intricate line. That is the advantage of choosing a clear focal point instead of trying to use every item in the box: the design stays legible, and you spend less time decorating.
Keep a small plate nearby for wrappers and spare decorations. It sounds minor, but it stops a clear plastic pick from disappearing among black-and-orange sprinkles. If children help, give them edible items to place while an adult handles picks, sharp wires, and candles. Separating those jobs makes the activity easier to supervise without taking all the fun out of decorating.
Check edible labels, allergens, and small parts before serving
Check every decoration before it reaches the cake: some pieces are edible, and others are only cake toppers. Plastic figures, wires, picks, and candles must come off before anyone eats the slice, and a label or product description should tell you what the edible items contain. This distinction affects both decorating and serving: non-edible pieces can be useful as reusable accents, but they need to be removed and accounted for before cutting so they do not end up hidden in a slice.
Allergy information matters even when the decoration looks tiny. Candy pieces, sprinkles, and colored decorations may contain or share equipment with common allergens, and the details vary by seller. Read the ingredient and cross-contact statements for the specific product; if a guest has a serious allergy and the label leaves questions, contact the seller or manufacturer rather than guessing. A themed kit is not necessarily a single food product, so check each edible component instead of relying on a general product title or one package description.
Picture a school Halloween party where one child has a food allergy and another wants to grab a ghost topper. Keep packaging available so an adult can check ingredients, and place small, hard decorations where young children will not reach them unsupervised. Follow the product’s age guidance, and supervise around sharp picks and lit candles. If you cannot verify whether an edible decoration is suitable for a guest, leaving it off that portion of the cake is safer than assuming a small amount will not matter.
Serving rule: Remove non-edible decorations before cutting, and never treat a topper as edible just because it sat on a cake.
Safe handling does not stop at the party table. Keep the cake covered and follow safe storage practices for its ingredients; perishable frosting or fillings should not sit out for hours. As a general food-safety rule, keep perishable foods at 40°F (4°C) or colder until serving, and do not leave them at room temperature for more than two hours—or one hour when the temperature is above 90°F (32°C). Check your recipe and local food-safety guidance, especially for cream, custard, or cream-cheese fillings. Decorating plans should fit those limits: if a cake must be chilled, choose decorations that can tolerate refrigeration or wait to add delicate pieces until closer to serving.
Get more from the kit by matching it to your cake and party
You get better value from a decorating kit when you plan around the dessert size and party setup, rather than trying to put every decoration on one cake. Many kit pieces also work on cupcakes, cookies, brownies, or a dessert tray, though a large topper or stencil may only fit a particular surface. The useful comparison is not simply price per piece: consider how many pieces you can use, whether they suit the dessert, and whether you would otherwise buy the same supplies separately.
Start with scale. A small cake can look crowded with ten large toppers, while a wide sheet cake may make a few small bats vanish. If the kit lists 30 grams of sprinkles but only four toppers, decide whether you want a sprinkle-heavy finish or a few dramatic focal pieces. Numbers in the listing help you imagine the final look before you commit. A large count can be misleading if most items are tiny, while a smaller set may work well when its few statement pieces are paired with decorations you already own.
For instance, if you’re hosting 12 people and serving one 8-inch cake plus a dozen cupcakes, use the centerpiece topper on the cake and share the smaller edible decorations across the cupcakes. Put a few cookies beside the cake and use leftover sprinkles there. This creates a coordinated table without requiring a separate kit for each dessert. If every guest should receive an individually decorated treat, however, count out the pieces first; sharing accents across a table will not solve a shortage of individual toppers.
Style also changes the feel of the room. Orange, black, purple, green, and white make a familiar Halloween palette; metallic accents or a dark drip can add drama, but they may compete with a busy topper. Recent decorating styles favor strong contrast and a clear focal point, particularly for photos. Pick one visual star—perhaps a white ghost against dark frosting—and let the rest of the cake support it. This makes the decoration easier to read from across the table and keeps a limited number of pieces from looking scattered.
Check the kit’s cake compatibility before checkout. If you’re baking a tall layer cake, low toppers may disappear against the sides; if you’re decorating cookies, a cake-sized stencil may be awkward. A quick measurement and a count of guests can save you from buying a set that looks generous in its product photo but skimpy on your table. Also consider whether the decorations suit the way you plan to serve: a tall topper may be attractive on a whole cake but inconvenient if the cake needs to be covered, chilled, or transported.
Time decoration around frosting, heat, and storage
Decorate in stages: add sturdy items once the frosting is ready, but wait until near serving to place fragile candy, paper, or chocolate details. Heat and moisture change how decorations behave; a crisp bat can turn limp, and a candy eye can slide down soft frosting like it has somewhere better to be. Timing is a tradeoff: decorating fully ahead saves party-day work, but delicate details may lose their shape or color while the cake sits.
Storage depends on the cake and decoration, so follow the recipe and package instructions. Refrigeration can protect a perishable filling, but moisture in the fridge may affect some candy or paper elements. If your cake needs chilling, store it covered and consider adding delicate decorations after it comes out, allowing time for it to reach serving temperature when appropriate. Do not sacrifice safe storage to protect a decoration; instead, choose sturdier accents or add vulnerable details later.
Imagine you’re baking the night before a party. You can frost the cake, add sturdy plastic toppers only if the product directions permit, and keep edible sprinkles sealed and dry. On party day, add fragile chocolate pieces close to serving and light candles only when guests are ready. That small timing change protects sharp colors and crisp edges while keeping the most time-consuming work out of the final rush.
Use a clean, dry storage container that protects the cake without pressing on the decoration. Keep leftover edible decorations sealed according to their label; do not assume every candy or fondant shape can be reused after contact with frosting. Reuse only non-edible items designed for reuse, and wash them safely before storing. Edible decorations are single-use, while reusable toppers still need a clean, dry home after the party. If the storage container cannot fit the topper without contact, remove it and store it separately when its directions allow.
Frequently Asked Questions
What usually comes in a Halloween cake decorating kit?
Contents vary, but kits may include toppers, sprinkles, candles, piping supplies, stencils, or edible shapes. Check the product description for counts and confirm whether you need to buy the cake, frosting, food coloring, or basic tools separately.
Are Halloween cake decorations edible?
Some are edible, but plastic toppers, picks, wires, and candles are not. Read the labels and remove non-edible parts before serving; do not assume a decoration is edible because it touches the frosting.
Can a beginner use a Halloween cake decorating kit?
Yes. Choose a kit built around ready-made toppers, sprinkles, or stencils rather than detailed piping if you want an easy starting point. A simple orange-frosted cake with a few ghosts can look polished without advanced technique.
How many cakes or cupcakes can one kit decorate?
It depends on how many pieces the kit contains and the size of your desserts. Compare the quantities with your guest count: a handful of large toppers may suit one cake, while sprinkles or small edible shapes can stretch across several cupcakes.
When should I decorate a Halloween cake?
Timing depends on the frosting and decorations. Add sturdy pieces when the cake is ready, but place delicate candy, paper, or chocolate elements close to serving if heat or moisture could soften them. Follow storage instructions for the cake, especially when it contains perishable fillings.
Can I use one kit on cupcakes and cookies too?
Many sprinkles and small edible shapes work across cupcakes, cookies, and brownies. Large toppers and stencils may be sized for cakes, so check their dimensions and plan a shared focal point rather than forcing every piece onto every dessert.
Conclusion
Choose a kit that fits the cake you’re making, the time you have, and the people who will eat it. Read the contents and safety labels, build the design around one strong focal point, and save fragile details for near serving.
A few well-placed ghosts can turn an ordinary cake into the center of the Halloween table. Let the cake look festive—not frantic.
NFL season / tailgating Picks
team gear
As an affiliate, we earn on qualifying purchases.